Tips for blood spots

TW: Discusses blood and needles. My recent sapropterin trial meant I was doing daily blood spots. I reviewed different lancets and came up with a few tips.
TLDR: the lancet used makes a difference to pain & healing, as does choosing the site carefully.
My first memories of blood spots are not happy ones. Back in the 1980s, lancets for home use did not exist in rural NZ. One parent would hold my heel or finger still while the other jabbed it with a sanitised sewing needle. Occasionally, they went a little too deep. Often, understandably, the jab was too shallow and needed repeating. No one was happy with this, so we avoided the process.
PKU blood spots while avoiding needles
The solution was to do a blood spot whenever a scraped knee or a cut finger allowed. Our testing kit was stored with the plasters, and my parents would fill in a blood spot card before patching me up. If we got to the end of the month and I hadn’t hurt myself, then we’d resort to the sewing needle.
However, this was far from ideal. And I do not recommend this approach. Most of my childhood blood spots were not taken first thing in the morning and on an empty stomach. Those are the best conditions for the most accurate blood level reading. Plus, the random nature of injuries meant that some blood spots were only a week apart while others had a 6-week gap.
The Lancet device solution
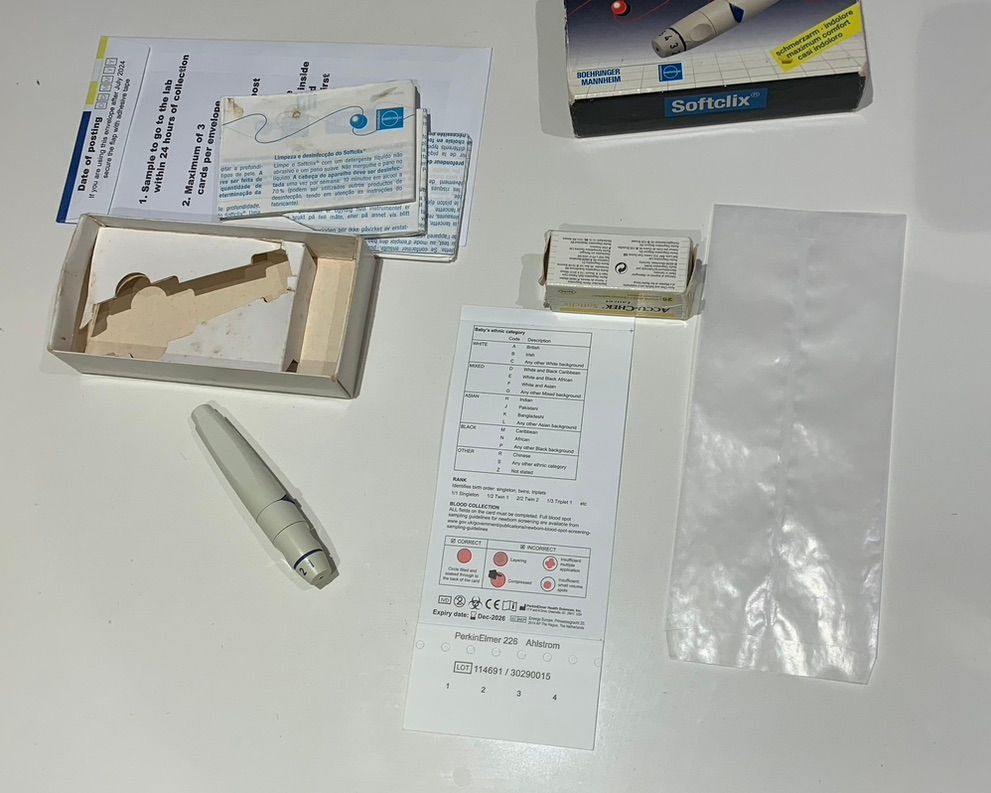
We found a solution when lancet devices became commercially available. My parents found a Softclix device that was initially developed for diabetics. This changed our blood spot routine for the better.

In my teens, I happily started taking blood spots on my own. The Softclix, like other lancet devices which are now common, regulates how deep the needle will go. I still use my decades-old device now, as a replacement lancets are available in most chemists. While such devices are pricier than single use-lancets (£5-£15), mine has lasted nearly 30 years, and many house moves. It is certainly worth the investment for someone doing regular blood spots.
Lancet Trials
My recent sapropterin trial meant I was doing blood spots every day, so I experimented with the different lancets. Oh my goodness, not all lancets are equal! While no blood collection method is fun or painless, the type of lancet used does have a significant effect on pain and healing. Over the years, I have accumulated several single-use lancets alongside my Softclix device. I trialled them all over the last few months and present them below in order of comfort.
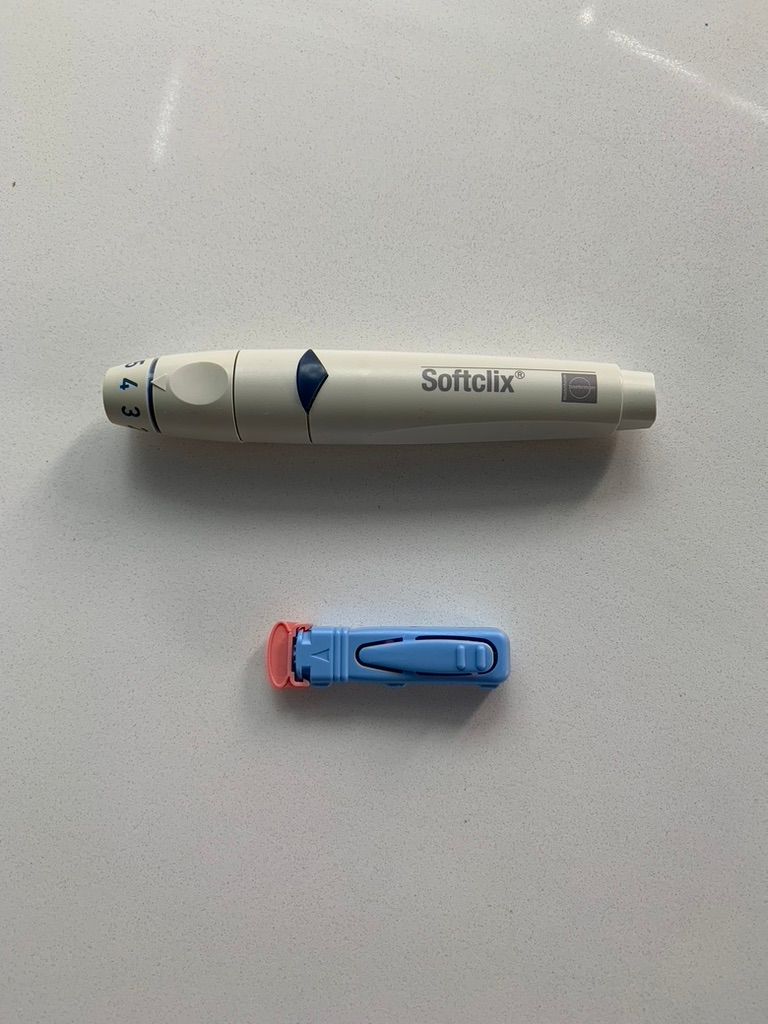
Lancet device
This was the by far the most comfortable method, though please note that I’m used to it. This is a device shaped like a thick pen, and replaceable lancets are widely available. It is activated by a button, and you can adjust how deep the lancet goes. This is handy for children, and where a new activity might produce a callus. Do note that children should not fill or empty the device, however, as the needle is exposed during this process.
- Pros: the most comfortable, long-lasting device, adjustable.
- Cons: expensive, children shouldn’t use, needs a bit of time to set up.
Examples: https://www.accu-chek.co.uk/lancing/fastclix.
Found at Boots: https://www.boots.com/truedraw-lancing-device-10248015 and a review site: https://www.diabeticcorner.com/truedraw-lancing-device/#product-reviews

Unistik lancet
Next was the blue Unistik, which is the one currently handed out by my NHS clinic. This is simple to use, as you simply twist out the pink cap, place it against the finger, and press the button. The needle is recessed when the device is spent. This was fairly easy to use, but every so often I found that the device had activated in storage, or while I was removing the pink cap. This isn’t too much of a bother provided you have a stock to hand. The needle went a little deeper than my usual lancet device setting, causing slightly more pain. Not enough to put me off, and I started using these on busy mornings to avoid setting up the lancet device.
- Pros: quick, simple to use, needle only exposed when device activated
- Cons: depth is not adjustable, need a supply as may already be activated
Example online: https://www.wms.co.uk/c/Unistik%26reg-3-Neonatal-and-Laboratory-%281-8mm%29-x100/p/D231
Pressing lancet
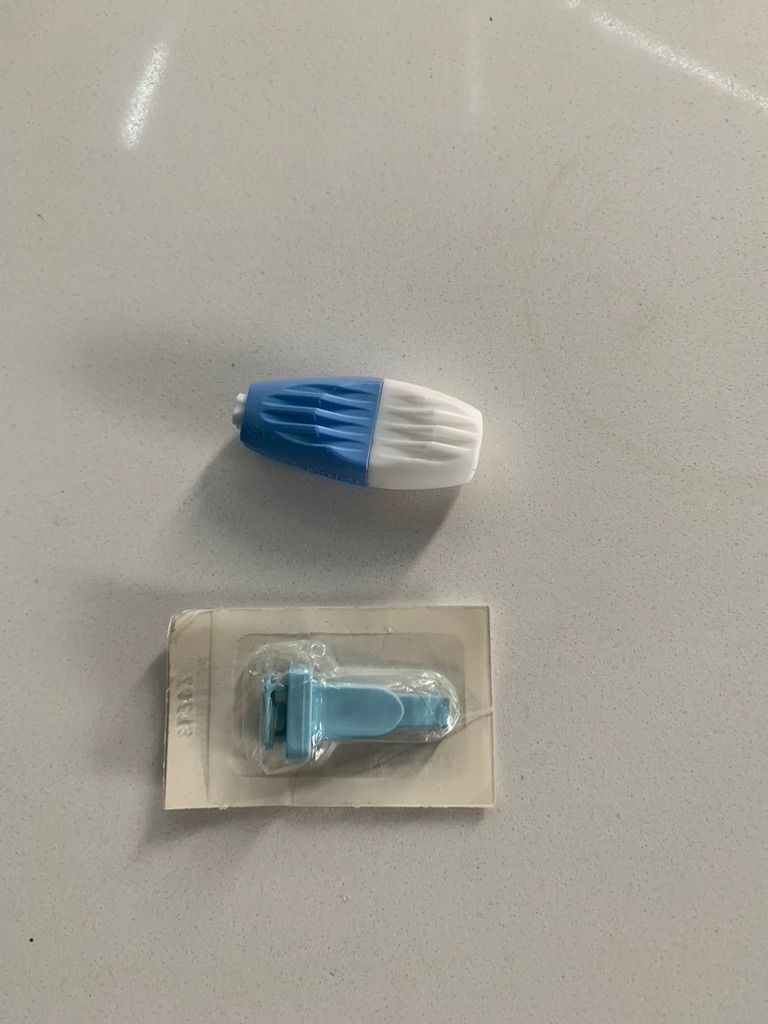
Third in the line-up was an oval, press activated lancet. This type is operated by pressing the lancet against your finger. There was something unpleasant about having to press it into your finger, rather than keep your hand still and push a button. It is a psychological thing, but unpleasant nonetheless. If done correctly, the needle in this device also tended to go quite deep – and wow, did it hurt! This meant I would press the device into the finger while at the same time trying to pull away to avoid the pain. This lancet was not fun, and the site hurt for a day following.
- Pros: quick, to use, needle only exposed when device activated
- Cons: depth is not adjustable and often hurts, possible psychological barrier.

Older pressing lancet
Lastly, and least recommended, was the older, square blue lancet at the bottom of the photo. Like the previous lancet, this device is activated by being pressed against the skin. Further, the needle on this is actually a small cutting blade. If you have serious callouses on your fingers, or have trouble getting enough blood for the spots, then this one might be for you. But I’m sure there are better options, such as the adjustable lancet devices! I had to use plasters for the first time in decades after using this, the blood simply wouldn’t stop. The site took a while to heal and hurt for several days.
- Pros: Plenty of blood.
- Cons: everything else.
(No online examples, as I couldn’t find any. I think this is an old one and if you do have any, do yourself a favour and avoid!)
Universal blood spot advice
The process of taking daily bloodspots for weeks taught me several universal truths. Firstly, even when the same lancet is used, some mornings a bloodspot will hurt more. Maybe the site is closer to the nerve, or the needle point is a little longer… I’m not certain. But doing the blood spots every day meant that I noticed the variation.
Lasting variations
The pain can also last for varying lengths of time. On good mornings there was the ‘little scratch’ and then that was it. On other days, the site ached for a while. Occasionally, the area still stung when touched in the afternoon, or over the following days. There seemed to be no rhyme or reason to this, though deeper lancets did hurt more, and for longer.
Healing time
Doing the blood spots daily also caused problems for my fingers. Sometimes the areas healed easily, sometimes they didn’t. I was rotating through both sides of every finger on my left hand, which gave them a week to heal. But by the end of the month I had several healing sites on a single finger.
Again, some blood spot wounds healed quickly and others didn’t. After a month of daily blood spots, my fingertips were a mess. Some sites had calloused over and others had started peeling. When I went back to regular weekly and monthly blood spots, this issue disappeared. I will try using other fingers in future, rather than just my favourite spot.
Universal tip!
The one universal thing across all blood spot testing is to allow a decent distance between the blood spot and the finger nail. Nothing was more annoying than to get a decent drop accumulated only for it to run into the nail bed. It meant I lost the drop, made a mess, and had to squeeze all over again. So, do take time to ensure that your chosen lancing site is on the side of the finger. The finger pads hurt more as there are more nerve endings there. So avoid the nail and the back if you can—no one said this was easy!
More help
The NPSKU has an advice sheet on getting your blood spots correct for labs in the UK. If you have any other advice, or a favourite lancet, then please tell me

Member discussion